
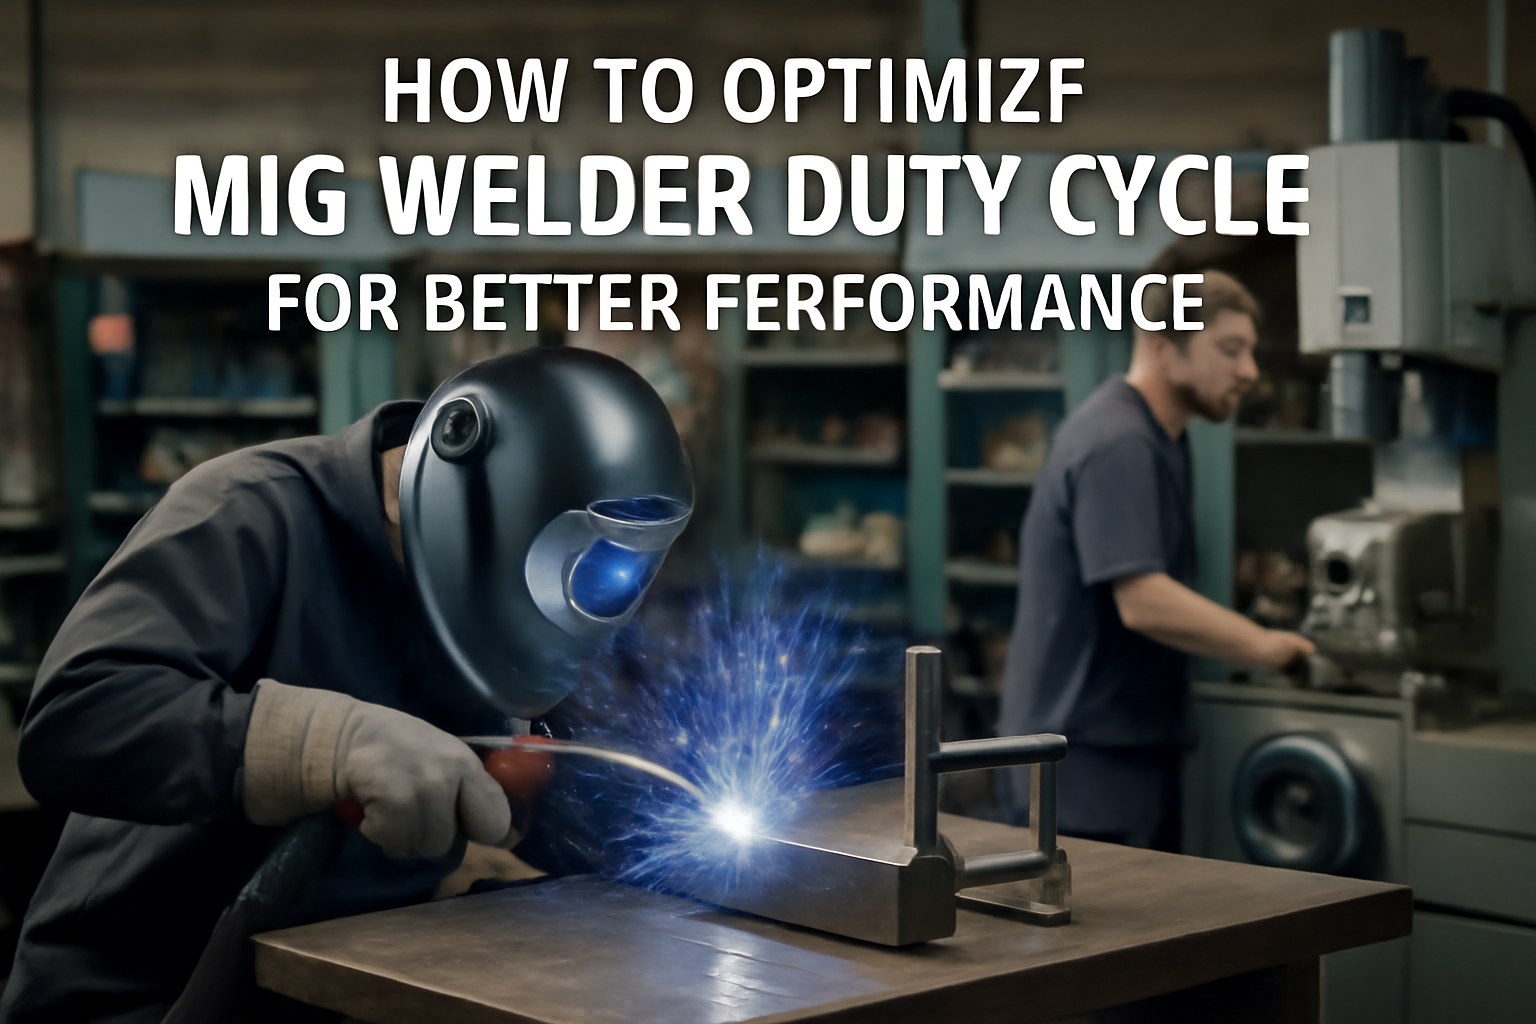
How to Optimize MIG Welder Duty Cycle for Better Performance

Optimizing the duty cycle of your MIG welder is crucial for achieving consistent and high-quality welds without risking equipment failure. The duty cycle represents the amount of time your welder can operate at a given amperage before it needs to cool down. Understanding how to maximize this capability can enhance both your productivity and the lifespan of your welding machine.
This guide will walk you through the steps to optimize your MIG welder's duty cycle, helping you avoid common pitfalls and ensuring you get the most out of your welding sessions. Whether you're working on metal fabrication projects or performing maintenance tasks, effective duty cycle management is key to success.
Table of Contents
Step 1: Understand Duty Cycle Basics
The duty cycle of a MIG welder is measured as a percentage over a specified time, typically 10 minutes. For example, a 60% duty cycle means you can weld for six minutes at a certain amperage before allowing a cooling period of four minutes. Knowing this is essential for planning your work sessions effectively. Comprehensive Guide to Industrial MIG Welders: Key Comparisons and Insights.
Understanding the duty cycle is crucial because it directly impacts your productivity and the quality of your welds. If you exceed the duty cycle, the welder may overheat, leading to potential damage or inconsistent welds. Therefore, it's important to consider not only the duty cycle rating but also how to work within its limits.
Calculating Your Duty Cycle
To calculate the effective duty cycle for your specific welding tasks, follow these steps:
- Identify the welder's duty cycle rating: Check the specifications of your MIG welder to find its duty cycle rating at various amperages.
- Determine your welding amperage: Decide the amperage you will be using for your welding project. This is often determined by the thickness of the material you are welding.
- Calculate the available welding time: Use the duty cycle percentage to find out how long you can weld before needing a break. For instance, if your welder has a 70% duty cycle at 150 amps, you can weld for 7 minutes and then rest for 3 minutes.
Common Mistakes to Avoid
When working with duty cycles, there are several common mistakes that can lead to inefficiencies or equipment damage:
- Ignoring the duty cycle: Many welders underestimate the importance of the duty cycle and may push their machines beyond safe limits, leading to overheating.
- Not accounting for heat buildup: Continuous welding without breaks can cause the welder to heat up quickly. Always plan for cooling periods, especially during extensive projects.
- Misreading the specifications: Ensure you understand the duty cycle as it relates to the specific amperage you are using. Duty cycles often vary significantly with different settings.
Real-World Example
Consider a scenario where you are welding 1/8-inch steel at 130 amps. If your MIG welder has a duty cycle of 80% at this amperage, you can weld for 8 minutes, followed by a 2-minute cooling period. If you plan to complete a 2-foot weld, you can estimate how many segments you can weld in that time frame, allowing for breaks to prevent overheating. This planning helps maintain efficiency and prevents equipment failure.
Maximizing Your Duty Cycle
To optimize your duty cycle during welding operations, consider the following strategies:
- Use a higher duty cycle welder: If your projects often require extended welding times, investing in a welder with a higher duty cycle can significantly boost productivity.
- Weld in shorter bursts: Instead of continuous welding, take short breaks to allow the machine to cool down, which can help maintain performance and prolong the lifespan of your equipment.
- Monitor the temperature: Use a thermometer or simply touch the welder to gauge its temperature. If it feels excessively hot, it's time to take a break.
By understanding these duty cycle basics and implementing these practices, you can enhance your welding efficiency and ensure your MIG welder operates at its best.
Step 2: Check Welding Machine Specifications
Before optimizing your welding performance, consult the welding machine specifications provided by the manufacturer. This information will include the maximum duty cycle ratings at various amperages. Understanding these limits will help you plan your welding tasks within the machine's capabilities, preventing overheating and potential damage.
Factors Affecting Duty Cycle
- Amperage Settings: Higher amperage settings will reduce the duty cycle. Always aim to use the lowest amperage necessary for your project.
- Cooling System: Ensure your welder has good ventilation and that the cooling system is functioning correctly. Overheating is a primary cause of duty cycle limitations.
- Work Environment: Ambient temperature can affect cooling rates. If you're working in a hot environment, your welder may need more cooling time.
Step 3: Optimize Welding Practices
Implementing efficient welding techniques can greatly affect how well you optimize your duty cycle. Here are some practical tips:
- Weld in Short Bursts: Instead of continuous welding, make short passes and allow for cooling periods in between. This will help maintain the machine's temperature. Aim for bursts of 5-10 seconds, followed by a cooling period of at least 20-30 seconds. This practice not only helps in maintaining the welder's temperature but also improves the overall quality of the weld by preventing overheating and warping.
- Use the Right Filler Material: Selecting an appropriate filler material can lead to more efficient welds, minimizing the time spent welding and the heat generated. For example, if you are welding mild steel, using ER70S-6 filler can provide better penetration and a stronger weld than other types. Always consult the manufacturer's specifications for the filler material and ensure it matches the base metals being welded.
- Adjust Travel Speed: A faster travel speed can reduce the amount of heat generated during the welding process, thus enhancing duty cycle performance. Test different travel speeds to find the optimal balance between speed and weld quality. A good starting point is to aim for a travel speed that allows you to maintain a consistent bead width while avoiding excessive heat input.
Additional Techniques for Optimization
Beyond the basic practices, consider these advanced techniques to further optimize your MIG welding duty cycle:
- Maintain a Steady Hand: A steady hand ensures consistent bead placement and reduces the need for multiple passes. Use a welding cart or a steady surface to help stabilize your movements.
- Optimize Gas Flow: Ensure that your shielding gas flow rate is set correctly. Too high a flow can lead to turbulence, while too low can result in contamination. A typical setting for MIG welding is between 15-25 CFH (cubic feet per hour).
- Monitor Weld Pool: Keep an eye on the weld pool to adjust your technique as needed. A well-formed weld pool indicates proper heat and filler material use. If the weld pool is too wide or too narrow, adjust your travel speed or voltage settings accordingly.
Common Mistakes to Avoid
When trying to optimize your duty cycle, be aware of these common mistakes:
- Ignoring Equipment Maintenance: Regularly check and maintain your MIG welder. Worn contact tips, liners, or nozzles can lead to poor performance and increased heat generation.
- Overheating the Welder: Pushing your machine beyond its duty cycle limits can cause overheating and damage. Always refer to the manufacturer's specifications for duty cycle ratings and adhere to them.
- Inconsistent Technique: Changing techniques frequently can lead to inconsistent welds and increased heat input. Stick to a consistent technique that works for your materials and conditions.
Conclusion
By implementing these practices and being mindful of common pitfalls, you can significantly optimize the duty cycle of your MIG welder. Remember that the goal is not only to maximize productivity but also to ensure high-quality welds that meet your project requirements.
Step 4: Regular Maintenance of Your MIG Welder
Routine maintenance is vital in ensuring your MIG welder operates efficiently and effectively. Here are key maintenance practices:
- Inspect Welding Torch Accessories: Regularly check for wear and tear on your welding torch accessories. Damaged components can lead to inefficiencies and increased heat generation. Pay special attention to the contact tip, nozzle, and gas diffuser. Replace any parts that show signs of pitting or excessive wear. A good rule of thumb is to inspect these parts after every 10 hours of use or more frequently if you notice issues.
- Clean the Machine: Keep your welder clean, especially the cooling vents, to prevent overheating. Use a soft brush or compressed air to remove dust and debris from the exterior and internal components. Make it a habit to wipe down the machine after each use to prevent buildup. Additionally, check for any spatter accumulation on the welding gun and clean it regularly to maintain a clear gas flow.
- Check Electrical Connections: Ensure that all electrical connections are secure and free from corrosion. Poor connections can lead to increased resistance and heat. Inspect the power cord and plug for any signs of damage. Tighten any loose connections and clean terminals with a wire brush if necessary. It's advisable to perform this check at least once a month, especially in a busy shop environment.
Additional Maintenance Tips
- Inspect the Drive Rollers: Check the drive rollers for wear and ensure they are correctly aligned. Misalignment can cause feeding issues, leading to inconsistent welds. Replace the drive rollers if they are worn down or damaged, and adjust the tension to ensure proper wire feed.
- Monitor Gas Flow: Regularly check the gas flow rate and ensure it is set according to the manufacturer's specifications. An incorrect flow rate can affect weld quality. Inspect the gas lines for leaks and replace any damaged hoses immediately to prevent gas loss and ensure safety.
- Test the Safety Features: Periodically check the safety features of your welder, such as the thermal overload protection. Ensure that the machine shuts off when it overheats. Familiarize yourself with the user manual to understand the specific safety features of your model.
Common Mistakes to Avoid
- Neglecting Routine Checks: Skipping regular inspections can lead to more significant issues down the line. Set a maintenance schedule to avoid overlooking these crucial tasks.
- Using Improper Cleaning Agents: Avoid using harsh chemicals or abrasive materials to clean your welder, as they can damage sensitive components. Stick to recommended cleaning products and methods.
- Ignoring Manufacturer Guidelines: Always refer to the manufacturer's maintenance guidelines for your specific MIG welder model. Following these recommendations ensures optimal performance and longevity.
By adhering to these maintenance practices, you can significantly extend the life of your MIG welder and maintain its duty cycle efficiency. Regular upkeep not only prevents unexpected breakdowns but also ensures that your welder performs at its best during critical tasks.
Step 5: Troubleshooting Common Duty Cycle Problems
Even with the best practices, issues can arise. Here are some common problems and how to troubleshoot them:
- MIG Welder Troubleshooting Arc Stability: If you notice inconsistent arc stability, check your gas flow rates and settings. Ensure that the shielding gas is adequate and that the torch is properly configured. Additionally, inspect the contact tip for wear or obstruction, as a clogged tip can disrupt the arc. It's also important to verify that your wire feed speed is set correctly; too fast or too slow can lead to poor arc stability. Regularly clean the nozzle and ensure that the ground clamp has a solid connection to the workpiece.
- Overheating Issues: If your welder frequently trips due to overheating, consider reducing the amperage settings or implementing longer cooling breaks in your welding schedule. Check for any obstructions around the welder's cooling vents, as poor airflow can exacerbate overheating. It's also wise to inspect the duty cycle rating of your welder to ensure that you are not exceeding it. If you are welding thicker materials, try using a welder with a higher duty cycle rating or adjust your technique to allow for more cooling time between welds. Keep an eye on the welder's thermal overload indicator; if it activates often, it's a sign that you need to adjust your usage patterns.
Additional Troubleshooting Tips
When facing duty cycle problems, consider the following checklist to systematically address issues:
- Check Electrical Supply: Ensure that your power supply is stable and within the required voltage range. Fluctuations can affect performance.
- Inspect Cables and Connections: Look for any signs of damage or wear on the welding cables and connections. Damaged cables can lead to increased resistance and overheating.
- Evaluate Material Preparation: Ensure that surfaces are clean and properly prepared. Contaminants can lead to poor weld quality and increased heat generation.
- Monitor Ambient Temperature: High ambient temperatures can affect the cooling efficiency of your welder. If you're working in a hot environment, consider additional cooling measures.
Common Mistakes to Avoid
To prevent duty cycle problems, avoid these common mistakes:
- Ignoring Manufacturer Guidelines: Always refer to the welder's manual for recommended settings and duty cycle limits. Ignoring these can lead to premature wear or failure.
- Overworking the Welder: Pushing the welder beyond its duty cycle can lead to overheating. Be mindful of the time spent welding versus cooling.
- Neglecting Maintenance: Regular maintenance is crucial. Failing to clean and inspect your equipment can lead to performance issues over time.
By following these troubleshooting steps and tips, you can effectively manage common duty cycle problems and maintain optimal performance from your MIG welder. This proactive approach will not only enhance your welding efficiency but also extend the lifespan of your equipment.
Step 6: Use the Right Equipment
Selecting the appropriate equipment is essential for optimizing your duty cycle. Consider these factors when choosing your welder:
- Welding Power Source: Ensure that your MIG welder is capable of handling the types of materials you are working with. For demanding applications, a dual voltage TIG welder may be beneficial.
- Quality of Consumables: Invest in high-quality welding consumables. Poor quality can lead to increased heat generation and premature wear on your machine.
- Evaluate Your Welding Equipment Collection: Regularly assess your welding equipment collection to identify any outdated or inefficient tools that may be hindering your performance.
Step 7: Keep a Duty Cycle Checklist
Creating a checklist can help you stay organized and ensure that you are maximizing your MIG welder's duty cycle. A well-structured checklist not only helps you remember essential tasks but also allows for consistent performance evaluations. Here's a simple checklist to consider, along with practical tips for each item:
- Review welding machine specifications: Start by familiarizing yourself with the manufacturer's specifications for your MIG welder. Understand the rated duty cycle at various amperage settings. This knowledge will help you set realistic goals for your welding projects.
- Monitor amperage settings during welding: Keep an eye on the amperage settings throughout your welding process. Using a higher amperage than necessary can lead to overheating, which can reduce the duty cycle. Consider using a digital ammeter for precise monitoring.
- Implement short welding bursts with cooling periods: Instead of long, continuous welds, break your work into shorter bursts. For instance, if your welder has a 60% duty cycle at 200 amps, try welding for 6 minutes followed by a 4-minute cooling period. This practice can help maintain the welder's temperature and prolong its life.
- Perform regular maintenance checks on your welder: Create a maintenance schedule that includes cleaning the contact tips, checking for gas leaks, and inspecting the power supply. Regular maintenance can prevent overheating and ensure that your welder operates efficiently.
- Ensure all welding torch accessories are in good condition: Inspect your welding torch, cables, and connectors for wear and tear. Damaged accessories can lead to poor performance and increased duty cycle strain. Replace any worn components before starting a project.
- Adjust travel speed and technique as necessary: Your travel speed significantly impacts heat input and duty cycle. If you notice excessive spatter or burn-through, slow down your travel speed. Experiment with different techniques, such as weaving or stringer beads, to find what works best for your material and thickness.
Additional Tips for Maximizing Duty Cycle
In addition to the checklist, consider these tips to further enhance your MIG welder's duty cycle:
- Use the right wire diameter: Selecting the appropriate wire diameter for your welding application can help maintain a lower duty cycle. Thinner wires require less heat, allowing for longer welding times without overheating.
- Optimize gas flow: Ensure that the shielding gas flow rate is set correctly. Too much gas can lead to turbulence, while too little can cause contamination. Aim for a flow rate that provides adequate coverage without excess.
- Maintain a clean work area: A clutter-free workspace can enhance efficiency and reduce the likelihood of accidents that may interrupt your welding process.
Common Mistakes to Avoid
Being aware of common mistakes can help you stay on track with your duty cycle management. Here are a few pitfalls to avoid:
- Ignoring the overheating warning: If your MIG welder shows signs of overheating, such as a burning smell or unusual noises, stop immediately. Continuing to weld can cause permanent damage.
- Neglecting to check the power supply: Ensure that your welder is connected to a reliable power source. Fluctuations in power supply can affect performance and duty cycle.
- Forgetting to document your settings: Keep a log of your settings and performance for different projects. This documentation can help you refine your technique and settings for future work.
By following this checklist and incorporating these additional tips, you can effectively manage your MIG welder's duty cycle, leading to improved performance and longevity of your equipment. Regularly revisiting and updating your checklist will also help you adapt to new projects and challenges in your welding work.
Conclusion
Optimizing your MIG welder's duty cycle is a practical way to improve your welding efficiency and extend the life of your equipment. By understanding the fundamentals, implementing best practices, and performing regular maintenance, you can achieve better performance on your projects. As a next step, evaluate your current welding practices and identify areas for improvement based on this guide.
Steps to Optimize Your MIG Welder Duty Cycle
- Understand Your Welder's Specifications: Review the manufacturer's manual to know the duty cycle rating at various amperages. This will help you understand the limitations of your machine.
- Monitor Your Welding Time: Keep track of how long you are welding continuously versus how long you are allowing the welder to cool. Use a timer if necessary to ensure you are sticking to the recommended duty cycle.
- Adjust Your Settings: Experiment with different voltage and wire feed speed settings to find a balance that allows for optimal performance without exceeding the duty cycle. Lowering the amperage can increase the duty cycle duration.
- Use the Right Wire: Selecting the appropriate welding wire for your project can impact the duty cycle. Thicker wires may require more heat and reduce your duty cycle, while thinner wires can allow for longer welding times.
- Implement Cooling Breaks: Schedule regular breaks during your welding sessions to allow the welder to cool down. This can be as simple as taking a few minutes to clean up your workspace or prepare your next weld.
Common Mistakes to Avoid
- Ignoring the Duty Cycle: Many welders push their machines beyond the duty cycle without understanding the consequences, which can lead to overheating and permanent damage.
- Welding at Maximum Amperage: Running your welder at its highest settings can quickly deplete the duty cycle. Instead, aim for mid-range settings that provide sufficient heat while prolonging the duty cycle.
- Neglecting Maintenance: Failing to clean and maintain your welder can lead to inefficiencies that impact the duty cycle. Regularly check for worn parts, clean the nozzle, and replace consumables as needed.
Final Recommendations
To further enhance your welding experience, consider investing in a welder with a higher duty cycle rating if you frequently work on large projects. Additionally, familiarize yourself with different welding techniques that can help you achieve better results while managing the duty cycle effectively. Continuous learning and adaptation are key to mastering MIG welding and optimizing your equipment.
In short
This post focuses on how to optimize mig welder duty cycle with a practical approach you can apply right away. Built for Enthusiasts / learners / participants (not sellers). You?ll see clear steps, common mistakes, and a simple execution path.
Quick answer
The fastest way to get results with how to optimize mig welder duty cycle is to follow a simple sequence: start with the basics, apply one proven method, measure a small set of signals, then improve one thing at a time. Avoid changing multiple variables at once so you know what worked. Audience-first only. Write like a trusted niche blog: helpful, clear, structured, and genuinely informative. Focus on fundamentals, improvement, terminology, culture, people, gear, and common scenarios in the niche. Do NOT write seller/operator content (no "Shopify apps", no "optimize your store", no "collections setup", no "increase conversion rate", no SEO/ads talk). Avoid aggressive CTAs and "buy now" language. If products are mentioned, keep it subtle and contextual (examples, use-cases, what to look for), never pushy.
Context and related concepts
Fundamentals ? Beginner basics ? Terminology ? Glossary ? Skills ? Techniques ? Best practices ? Common mistakes ? Gear / tools / materials ? Options ? Use-cases ? Tradeoffs ? Culture ? Lifestyle ? Community norms ? History ? People / creators / athletes ? Events ? Trends ? Care / maintenance ? Safety ? Sizing / fit (if relevant)
FabCore X Supply: FabCore X Supply is an online distributor of industrial metalworking and fabrication equipment. We sell equipment used in welding, cutting, forming, and machining including TIG welders, MIG welders, plasma cutters, bandsaws, cold saws, drill presses, lathes, belt grinders, ironworkers, tube benders, metal shears, press brakes, shop presses, arbor presses, notchers, track torches, welding tables, welding carts, welding helmets, PAPR welding respirators, rod ovens, and metal fabrication accessories. We are an authorized retailer for manufacturers including Arc Star, Blue Demon, Blue Star, HTP America, Laguna Tools, Metal Man, Metalpro, Optrel, Sumner, TIG Star, and WeldPro.