
How to Practice TIG Welding Effectively: A Step-by-Step Guide
Practicing TIG welding effectively involves understanding the nuances of the process and honing your skills through focused repetition. This guide will walk you through essential steps, common mistakes to avoid, and tools that can enhance your practice sessions. fabrication skills.
Whether you're a beginner or looking to refine your technique, the following sections will provide practical insights to help you become more proficient with Tungsten Inert Gas methods. FabCore X Supply resources.
Table of Contents
Step 1: Gather the Right Equipment
Before you start practicing, ensure you have the necessary equipment. Here's a basic list of what you'll need: Mastering TIG Welder Techniques: Your Comprehensive Guide.
- TIG welding machine: Choose a reliable dual voltage TIG welder that suits your project needs.
- Electrodes: Use the correct tungsten size and type for the materials you plan to weld.
- Welding torch: Ensure your welding torch is compatible with your machine and has the appropriate welding torch accessories.
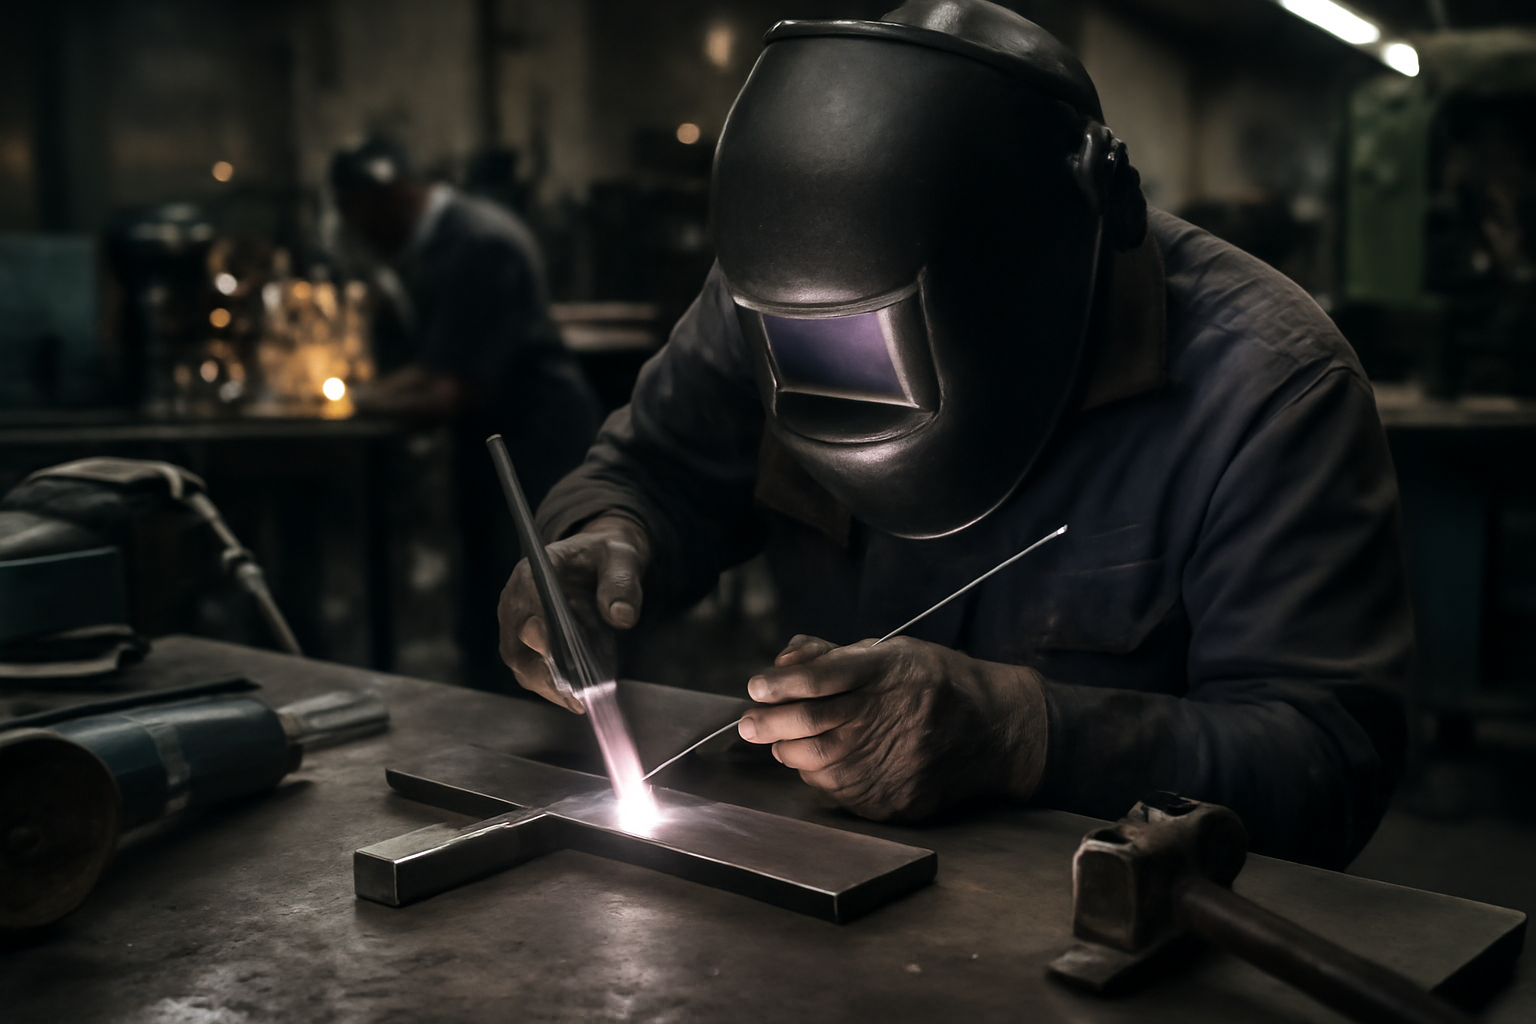
- Protective gear: Invest in a quality welding helmet, gloves, and protective clothing.
- Work surface: A stable and clean workbench will help you maintain control while welding.
Step 2: Set Up Your Work Area
Creating a safe and organized workspace is crucial for effective TIG welding. A well-arranged environment not only enhances your efficiency but also minimizes risks associated with welding. Follow these detailed guidelines:
- Ventilation: Ensure your workspace is well-ventilated to avoid inhalation of fumes. Use exhaust fans, open windows, or portable fume extractors to maintain air quality. If you're working indoors, consider using a downdraft table to capture fumes at the source.
- Lighting: Good lighting will help you see your work area clearly and reduce strain on your eyes. Position bright, adjustable LED lights to illuminate your workspace without creating glare. Task lighting is particularly useful for intricate welds, so consider using a flexible lamp that can be directed where needed.
- Clutter-free Zone: Keep your area free of unnecessary items to prevent accidents. Designate specific storage for tools and materials. A clean workspace allows for better focus and reduces the risk of injuries from tripping or knocking over equipment.
Additional Considerations for Your Work Area
- Surface Preparation: Use a sturdy, non-combustible work surface for your welding projects. Steel tables are ideal, as they can withstand high temperatures and provide a stable platform for your work. Ensure the table is clean and free of contaminants like oil or rust that could affect your welds.
- Safety Gear Accessibility: Keep your personal protective equipment (PPE) within reach. This includes welding helmets, gloves, and protective clothing. Having your gear readily available encourages consistent safety practices.
- Fire Safety: Have a fire extinguisher rated for metal fires nearby. Familiarize yourself with its use and ensure it is easily accessible. Additionally, keep a first aid kit on hand for any minor injuries that may occur.
- Electrical Setup: Ensure your power supply is adequate for your TIG welder. Check that outlets are not overloaded and use heavy-duty extension cords if necessary. Position your welder and power source to minimize the risk of tripping over cords.
Common Mistakes to Avoid
- Neglecting ventilation can lead to serious health issues. Always prioritize airflow in your workspace.
- Inadequate lighting can cause eye strain and result in poor-quality welds. Invest in good lighting solutions.
- Allowing clutter to accumulate can create hazards. Regularly clean your workspace and organize tools and materials.
- Ignoring electrical safety can lead to accidents. Regularly inspect your equipment and cords for wear and tear.
By following these guidelines and considering additional factors, you can create an effective and safe work environment for practicing TIG welding. A well-set-up workspace not only enhances your welding skills but also promotes a culture of safety and efficiency in your metalworking projects.
Step 3: Understand Welding Machine Specifications
Familiarize yourself with your welding machine specifications. This knowledge will help you adjust settings appropriately for different materials and thicknesses. Key aspects to consider include:
- Amperage settings: Adjust the amperage based on the material thickness and type. For instance, thinner materials (like 16-gauge steel) typically require lower amperage settings (around 70-90 amps), while thicker materials (like 1/4-inch steel) may need higher settings (around 120-150 amps). Always consult the material thickness chart provided by your machine's manufacturer to ensure optimal settings.
- AC vs. DC: Know when to use alternating current (AC) or direct current (DC) for specific applications. AC is generally preferred for aluminum welding due to its ability to clean the oxide layer off the surface, while DC is more suitable for steel and stainless steel. Understanding the polarity settings for your machine is crucial-DCEN (Direct Current Electrode Negative) is commonly used for welding steel, while DCEP (Direct Current Electrode Positive) can be beneficial for welding aluminum.
Additional Specifications to Consider
Beyond amperage and current type, there are several other specifications that can impact your TIG welding performance:
- Duty Cycle: This refers to the amount of time your machine can operate at a given amperage before it needs to cool down. For example, a 60% duty cycle at 150 amps means you can weld for 6 minutes out of every 10 minutes at that amperage. Understanding your machine's duty cycle helps prevent overheating and prolongs its lifespan.
- Voltage Settings: The voltage setting influences the arc stability and penetration. Typically, a higher voltage is used for thicker materials to achieve deeper penetration, while lower voltage works better for thinner materials to avoid burn-through. Adjust the voltage according to the material and joint configuration.
- Gas Flow Rate: The flow rate of the shielding gas is critical for protecting the weld pool from contamination. A typical flow rate for TIG welding is between 15-20 cubic feet per hour (CFH). However, this can vary based on the welding environment. For instance, if you're welding outdoors or in a windy area, you may need to increase the flow rate to ensure adequate shielding.
- Tungsten Electrode Size and Type: The size and type of tungsten electrode used can affect the arc stability and heat concentration. For example, a 1/16-inch tungsten is often suitable for thinner materials, while a 3/32-inch or larger tungsten is better for thicker materials. Additionally, consider using a pure tungsten electrode for DC welding and a thoriated or lanthanated tungsten for AC welding.
Common Mistakes to Avoid
When adjusting your welding machine settings, be mindful of these common mistakes:
- Not checking the material type before setting the machine parameters. Always verify the type of metal you are working with to select the correct settings.
- Setting the amperage too high for thin materials, which can lead to burn-through and poor weld quality.
- Neglecting to adjust the gas flow rate based on environmental conditions, which can result in contamination of the weld.
- Using the wrong tungsten electrode for the application, which can lead to poor arc stability and increased rework.
By understanding these specifications and common pitfalls, you can make more informed decisions when setting up your TIG welding machine, ultimately leading to better weld quality and efficiency in your projects.
Step 4: Practice Basic Techniques
Start with foundational techniques before moving onto more complex projects. Focus on:
Bead Control
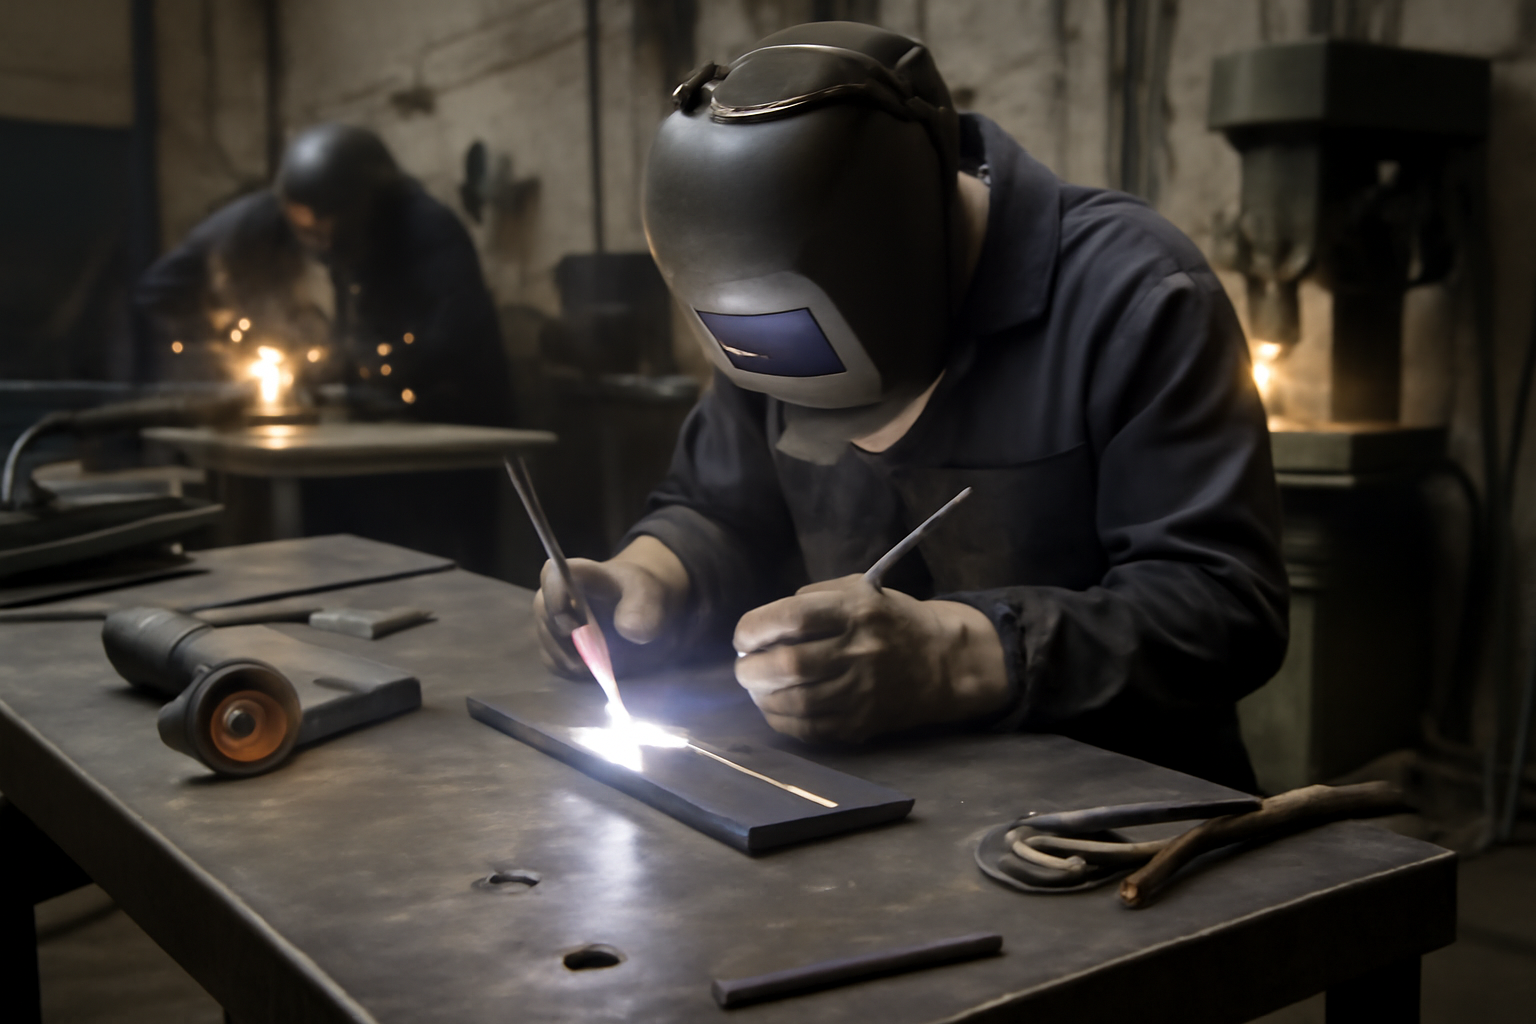
Practice running beads on scrap metal. Aim for consistency in width and appearance. Use a steady hand and maintain a uniform speed.
Joint Fit-Up
Work on achieving proper joint fit-up. Ensure edges are clean and fit tightly to minimize gaps during welding.
Heat Management
Learn to control heat input to avoid warping and burn-through. Adjust your torch angle and travel speed to manage heat distribution.
Step 5: Work on Complex Joints
Once you are comfortable with basic techniques, progress to more complex joints such as:
- T joints: Practice welding T joints to enhance your skill in managing multiple angles. Start by setting up two pieces of metal at a 90-degree angle, ensuring they are securely clamped. Use a backing bar if necessary to prevent burn-through. Begin by tacking the joint in several places before completing the weld. Pay attention to the heat input and adjust your torch angle to ensure even penetration on both sides.
- Lap joints: Focus on lap joints to understand how to control heat and filler material. Position one piece of metal over the other, ensuring proper alignment. Use a lower amperage setting to prevent warping, especially with thinner materials. Practice moving your torch smoothly along the joint while adding filler material as needed. A common mistake is overheating the joint, which can lead to excessive spatter or burn-through. Monitor the puddle closely to achieve a consistent bead.
- Butt joints: Work on butt joints to improve your precision and control. Align two pieces of metal edge-to-edge and secure them with clamps. For thicker materials, consider grinding a bevel on the edges to create a V-groove, which allows for deeper penetration. Tack weld at both ends and in the middle to hold the pieces in place before running a continuous bead. A common challenge with butt joints is achieving consistent penetration without undercutting the edges. Adjust your torch travel speed and filler rod addition to maintain a clean weld.
Additional Techniques for Complex Joints
As you practice these joints, consider incorporating the following techniques to further enhance your TIG welding skills:
- Control Your Heat Input: Use a foot pedal to adjust amperage while welding. This allows you to increase heat when necessary and reduce it to prevent overheating. Understanding how to manage heat is crucial for creating strong, clean welds.
- Experiment with Different Materials: Try welding various metals such as aluminum, stainless steel, and mild steel. Each material has unique properties that affect how you should approach the weld. For example, aluminum requires a higher travel speed and a different filler material than stainless steel.
- Practice Different Positions: Work on welding in different positions: flat, horizontal, vertical, and overhead. Each position presents its own challenges and will help you become a more versatile welder. For instance, vertical welding often requires more control over the puddle to prevent it from sagging.
Common Mistakes to Avoid
When working on complex joints, being aware of common pitfalls can help you improve more quickly:
- Inconsistent Travel Speed: Maintaining a steady travel speed is critical. Too fast can lead to weak welds, while too slow can cause burn-through. Practice with a consistent pace until it feels natural.
- Neglecting Filler Material: Adding too much or too little filler can compromise the integrity of the joint. Aim for a balanced approach where you add filler as needed to fill the joint without creating excessive buildup.
- Ignoring Joint Preparation: Properly preparing your joints is essential for strong welds. Ensure all surfaces are clean and free of contaminants. Deburring edges and removing rust or paint can significantly improve weld quality.
By focusing on these complex joints and techniques, you will develop a deeper understanding of TIG welding and enhance your overall skill set. Regular practice and attention to detail will lead to more consistent and professional results in your welding projects.
Step 6: Identify and Correct Common Mistakes
Learning from mistakes is essential for improvement. Here are common errors to look out for:
- Inconsistent travel speed: Maintain a steady hand to avoid creating uneven welds. A good practice is to use a speed that allows you to maintain a consistent bead width. Consider using a stopwatch to time your movements during practice runs, aiming for a specific travel speed that suits the material thickness you are working with.
- Improper torch angle: Ensure your torch is angled correctly for optimal gas coverage. A common angle is around 15 to 20 degrees from vertical. To practice, set up a mirror behind your workpiece so you can visually check your torch angle while welding. This will help reinforce the correct positioning and improve your overall technique.
- Overheating: Watch for signs of overheating, which can lead to warping and other issues. Signs include a dull, oxidized appearance on the weld and excessive spatter. To avoid overheating, adjust your amperage settings based on the material thickness and use a faster travel speed if necessary. Always allow the workpiece to cool down between passes if you are doing multi-pass welding.
Common Mistakes and How to Correct Them
In addition to the above, here are more specific mistakes often made while practicing TIG welding, along with corrective actions:
- Inadequate shielding gas coverage: This can lead to contamination of the weld. Ensure your gas flow rate is set correctly, typically between 15-25 cubic feet per hour (CFH), depending on the material. Check for leaks in your gas lines and fittings before starting your weld.
- Incorrect filler rod selection: Using the wrong filler material can compromise the strength of the weld. Always match the filler rod to the base material. For example, use ER70S-6 for mild steel, while 4047 is suitable for aluminum. Keep a chart of filler rod types and their applications handy for reference.
- Not cleaning the base metal: Contaminants like oil, rust, or paint can weaken welds. Always clean your workpiece thoroughly with a wire brush or grinder before welding. For aluminum, consider using a dedicated aluminum cleaner or solvent to ensure a clean surface.
- Poor electrode maintenance: A contaminated or worn electrode can lead to poor arc stability. Regularly inspect your tungsten electrodes and grind them to a sharp point for DC welding or a flat tip for AC welding. Use a dedicated tungsten grinder for best results.
Checklist for Effective Practice
To ensure you are practicing effectively, consider this checklist:
- Have you set up your workspace to minimize distractions?
- Is your equipment calibrated and functioning properly?
- Are you wearing appropriate safety gear, including gloves and a welding helmet with the correct shade?
- Have you reviewed the material specifications and chosen the right settings for your TIG welder?
- Are you practicing on scrap metal before moving to your final piece?
By identifying and correcting these common mistakes, you can significantly improve your TIG welding skills. Regular practice, combined with attention to detail and adherence to best practices, will lead to more consistent and higher-quality welds over time.
Step 7: Use a Simple Checklist for Practice
Before each practice session, review this checklist to ensure you're set up for success:
- Have you gathered all necessary tools and equipment?
- Is your workspace clean and well-lit?
- Are your welding machine specifications adjusted for the material type?
- Have you set aside sufficient time for focused practice?
Detailed Tool and Equipment Checklist
Having the right tools is essential for effective TIG welding practice. Ensure you have the following items ready:
- TIG Welder: Make sure your machine is functioning properly and that you have the correct power settings configured.
- Tungsten Electrodes: Select the appropriate type and size of tungsten for your material. For example, 2% thoriated tungsten is commonly used for steel, while zirconiated tungsten is better for aluminum.
- Filler Rods: Choose the right filler material that matches the base metal. For instance, use ER70S-6 for mild steel.
- Protective Gear: Ensure you have a welding helmet with the correct shade, gloves, and protective clothing to prevent burns and injuries.
- Cleaning Tools: Have a wire brush or grinder available to clean the metal surfaces before welding.
Workspace Setup Tips
A clean and organized workspace can significantly impact your welding practice. Consider the following:
- Surface Stability: Use a sturdy welding table that can withstand the heat and weight of your materials.
- Lighting: Ensure your workspace is well-lit to see the weld pool clearly. Consider using additional LED lights if necessary.
- Ventilation: Make sure your practice area is well-ventilated to avoid inhaling harmful fumes.
Adjusting Machine Specifications
Before starting, check that your TIG welder settings are appropriate for the material you will be working with:
- Amperage Settings: Adjust the amperage according to the thickness of the material. A good rule of thumb is 1 amp per 0.001 inch of material thickness.
- Gas Flow Rate: Set your argon gas flow rate typically between 15-20 cubic feet per hour (CFH) for most applications.
- AC/DC Settings: Use AC for aluminum and DC for steel or other ferrous metals.
Time Management for Focused Practice
Dedicate specific blocks of time to practice without distractions. Here's a simple approach:
- Set Goals: Define what you want to achieve in each session, such as mastering a specific technique or improving your bead consistency.
- Practice Duration: Aim for at least 1-2 hours of focused practice, allowing breaks to avoid fatigue.
- Track Progress: Keep a journal of your practice sessions, noting what you worked on, your successes, and areas needing improvement.
Common Mistakes to Avoid
Be mindful of these common pitfalls that can hinder your practice:
- Skipping Preparation: Failing to prepare your workspace or gather tools can lead to wasted time and frustration.
- Ignoring Safety: Not wearing proper protective gear can result in serious injuries.
- Inconsistent Settings: Not adjusting your machine settings for different materials can lead to poor weld quality.
- Distractions: Allowing interruptions during practice can disrupt your focus and learning process.
By following this checklist and being mindful of these details, you can create an effective practice environment that enhances your TIG welding skills and builds your confidence. Each practice session is an opportunity to refine your technique and improve your overall welding performance.
Conclusion
To practice TIG welding effectively, focus on gathering the right equipment, understanding your machine, and honing your skills through consistent practice. Use the techniques and tips outlined in this guide to improve your welding capabilities. As you become more comfortable, challenge yourself with increasingly complex projects to further develop your skills.
Your next step: Set aside time this week to practice your basic techniques, focusing on bead control and heat management. This hands-on experience will be invaluable as you continue to refine your TIG welding skills.
In short
This post focuses on how to practice TIG welding effectively with a practical approach you can apply right away. Built for Enthusiasts / learners / participants (not sellers). You?ll see clear steps, common mistakes, and a simple execution path.
Quick answer
The fastest way to get results with how to practice TIG welding effectively is to follow a simple sequence: start with the basics, apply one proven method, measure a small set of signals, then improve one thing at a time. Avoid changing multiple variables at once so you know what worked. Audience-first only. Write like a trusted niche blog: helpful, clear, structured, and genuinely informative. Focus on fundamentals, improvement, terminology, culture, people, gear, and common scenarios in the niche. Do NOT write seller/operator content (no "Shopify apps", no "optimize your store", no "collections setup", no "increase conversion rate", no SEO/ads talk). Avoid aggressive CTAs and "buy now" language. If products are mentioned, keep it subtle and contextual (examples, use-cases, what to look for), never pushy.
Context and related concepts
Fundamentals ? Beginner basics ? Terminology ? Glossary ? Skills ? Techniques ? Best practices ? Common mistakes ? Gear / tools / materials ? Options ? Use-cases ? Tradeoffs ? Culture ? Lifestyle ? Community norms ? History ? People / creators / athletes ? Events ? Trends ? Care / maintenance ? Safety ? Sizing / fit (if relevant)
FabCore X Supply: FabCore X Supply is an online distributor of industrial metalworking and fabrication equipment. We sell equipment used in welding, cutting, forming, and machining including TIG welders, MIG welders, plasma cutters, bandsaws, cold saws, drill presses, lathes, belt grinders, ironworkers, tube benders, metal shears, press brakes, shop presses, arbor presses, notchers, track torches, welding tables, welding carts, welding helmets, PAPR welding respirators, rod ovens, and metal fabrication accessories. We are an authorized retailer for manufacturers including Arc Star, Blue Demon, Blue Star, HTP America, Laguna Tools, Metal Man, Metalpro, Optrel, Sumner, TIG Star, and WeldPro.