
Mastering TIG Welder Techniques: Your Comprehensive Guide
TIG welding, or Tungsten Inert Gas welding, is a versatile and precise method favored by metalworking enthusiasts and professionals alike. This guide aims to equip you with foundational techniques and knowledge that will enhance your welding skills, whether you're just starting out or looking to refine your approach.
From understanding the equipment to mastering advanced techniques, we'll cover everything you need to know about TIG welding. Let's dive into the essential aspects of this welding method and help you become a more confident welder.
Table of Contents
Understanding the Basics of TIG Welding
What is TIG Welding?
TIG welding, or Tungsten Inert Gas welding, utilizes a non-consumable tungsten electrode to produce the weld. An inert gas, typically argon, shields the weld area from contamination, ensuring a clean and strong bond. This method is suitable for welding various metals, including stainless steel, aluminum, and magnesium. TIG welding is known for its precision and versatility, making it a preferred choice for applications requiring high-quality welds.
Key Components of TIG Welding
To effectively perform TIG welding, you need to familiarize yourself with several key components:
- Tungsten Electrode: The core of the welding process; it must be properly sharpened for optimal performance. A sharp point allows for better arc control and heat concentration. Common tungsten electrode types include pure tungsten, thoriated, and ceriated, each suited for specific applications.
- Welding Torch: Holds the tungsten and directs the shielding gas to the weld. There are different torch styles, such as air-cooled and water-cooled, with the choice depending on the welding environment and duration of use. Ensure the torch is comfortable to hold and easy to maneuver.
- Filler Rod: Optional material added to the weld pool to strengthen the joint. When selecting a filler rod, match the alloy to the base metal for optimal results. Common diameters range from 1/16" to 3/32", and the choice depends on the thickness of the material being welded.
- Power Supply: Provides the necessary current for welding; can be AC or DC depending on the material. AC is typically used for aluminum, while DC is preferred for steel and stainless steel. Ensure the power supply is set correctly for the material and thickness to avoid burn-through or insufficient penetration.
- Shielding Gas: Protects the weld from atmospheric contamination; argon is most commonly used. For specific applications, you may also use a mix of argon and helium to enhance arc stability and heat input. Proper gas flow rate is crucial; typically, it should be set between 15-25 cubic feet per hour (CFH).
Setting Up Your TIG Welding Equipment
Before starting your welding project, it's essential to set up your equipment correctly to ensure optimal performance and safety. Follow these steps:
- Choose the Right Tungsten Electrode: Select the appropriate tungsten electrode based on the material type and thickness. For example, a 2% thoriated tungsten is ideal for DC welding on steel.
- Prepare the Welding Torch: Insert the tungsten electrode into the torch and secure it tightly. Adjust the gas lens or cup size based on the welding position and joint configuration.
- Set the Power Supply: Adjust the amperage on the power supply based on the material thickness. A general rule is to set 1 amp for every 0.001 inch of material thickness.
- Connect the Ground Clamp: Ensure the ground clamp is securely attached to the workpiece to prevent electrical issues. A poor ground connection can lead to erratic arcs.
- Check the Gas Flow Rate: Turn on the shielding gas and adjust the flow rate to the recommended setting for your torch and material. Check for any leaks in the system.
Common Mistakes to Avoid in TIG Welding
Even experienced welders can make mistakes that affect the quality of their work. Here are some common pitfalls to avoid:
- Incorrect Tungsten Preparation: Failing to sharpen the tungsten electrode adequately can lead to poor arc stability. Always ensure the tip is pointed and clean before starting.
- Improper Amperage Settings: Setting the amperage too high can cause burn-through, while too low can lead to weak welds. Always adjust based on material thickness and type.
- Inadequate Gas Coverage: Insufficient shielding gas can result in contamination and porosity in the weld. Ensure the gas flow is consistent and adequate for the welding environment.
- Neglecting Cleanliness: Contaminated surfaces can compromise weld integrity. Always clean the base materials thoroughly before welding.
- Poor Post-Weld Treatment: Failing to inspect and clean the weld after completion can lead to long-term issues. Inspect for defects and clean the area to prevent corrosion.
By understanding the basics of TIG welding and familiarizing yourself with these key components and common practices, you can enhance your welding skills and produce high-quality welds consistently.
Essential TIG Welding Techniques
1. Preparing Your Workspace
A clean and well-organized workspace is crucial for successful TIG welding. Ensure that your work area is free of debris, and that you have all necessary tools within reach. Proper ventilation is also important to avoid inhaling harmful fumes.
2. Setting Up Your Equipment
Before you start welding, ensure that your TIG welder is correctly set up. This includes:
- Choosing the right tungsten electrode type and size.
- Setting the appropriate amperage based on the thickness of the material.
- Adjusting the flow rate of the shielding gas.
3. Welding Technique Fundamentals
When welding, maintain a steady hand and a consistent travel speed. Here are some fundamental techniques:
- Angle of the Torch: Hold the torch at a slight angle, typically around 15 degrees, toward the direction of travel.
- Travel Speed: Keep a consistent speed to avoid undercutting or burning through the material.
- Arc Length: Maintain a short arc length, about the thickness of the electrode, to achieve a stable arc.
Advanced TIG Welding Techniques
1. Pulsed TIG Welding
Pulsed TIG welding allows for better control of heat input, making it ideal for thin materials. It alternates between high and low current, reducing the risk of warping and burn-through. This technique is particularly useful when working with materials such as aluminum or stainless steel, where overheating can lead to significant issues.
To effectively utilize pulsed TIG welding, follow these steps:
- Set Up Your Equipment: Ensure your TIG welder has a pulsing feature. Adjust the pulse frequency (typically between 0.5 to 10 Hz) based on the material thickness and type.
- Choose the Right Amperage: Set the peak amperage for your material thickness. For example, 1 amp per 0.001 inch of thickness is a good rule of thumb.
- Adjust the Background Amperage: Set the background amperage to about 30-50% of the peak amperage. This helps maintain a stable arc while cooling the weld pool.
- Practice Your Technique: Start with a few test welds on scrap material to refine your settings and technique before moving on to your actual project.
Common mistakes to avoid include setting the pulse frequency too high, which can lead to an erratic arc, and not practicing enough on scrap materials before tackling the final workpiece.
2. Weaving Techniques
Weaving involves moving the torch in a side-to-side motion while welding. This technique is useful for wider joints and helps distribute heat evenly, preventing distortion. Weaving can also enhance the appearance of the weld bead and improve penetration.
Here's how to effectively execute weaving techniques:
- Determine the Weave Pattern: Choose between a zig-zag, circular, or figure-eight pattern based on the joint configuration and material type.
- Control Your Speed: Maintain a consistent travel speed to ensure uniform heat distribution. Too fast may lead to weak welds, while too slow can cause excessive heat buildup.
- Adjust Your Amperage: Depending on the weave width, you may need to adjust your amperage. Wider weaves typically require higher amperage to maintain a stable arc.
- Practice on Scrap Material: Experiment with different weave patterns and speeds on scrap pieces to find what works best for your specific application.
Common mistakes include inconsistent travel speed and poor torch angle, which can lead to uneven welds and increased risk of defects.
3. Joint Preparation
Proper joint preparation can significantly affect the quality of the weld. Ensure that the edges of the metals are clean and free from rust, oil, or other contaminants. Use a grinder or file to create a suitable bevel if necessary.
Follow these essential steps for effective joint preparation:
- Clean the Base Metals: Use a degreaser or solvent to remove any oils or grease. A wire brush can help remove rust or oxidation.
- Inspect for Contaminants: Check for any foreign materials that could affect the weld, such as paint or coatings. If necessary, sand or grind these away.
- Create a Proper Bevel: For thicker materials, bevel the edges to create a groove that allows for better penetration and fusion. A 30-45 degree bevel is often recommended.
- Fit-Up the Joint: Ensure that the pieces fit together snugly without gaps. Use clamps or fixtures to hold them in place during welding.
Common mistakes in joint preparation include inadequate cleaning, which can lead to contamination in the weld, and improper fit-up, which can cause weak joints and defects in the finished product.
Common TIG Welding Mistakes to Avoid
1. Incorrect Amperage Settings
Using the wrong amperage can lead to poor weld quality. Too low can result in weak welds, while too high can cause burn-through. Always check your settings based on the material thickness. A general rule of thumb is to set your amperage at 1 amp for every 0.001 inches of material thickness. For example, if you are welding 1/8 inch (0.125 inches), set your amperage to about 125 amps. However, always adjust based on specific material types and joint configurations.
Common mistakes include:
- Not adjusting for different materials: Different metals require different amperage settings. For instance, aluminum typically needs a higher amperage compared to stainless steel.
- Ignoring the heat build-up: If you notice excessive heat or discoloration, reduce the amperage to prevent burn-through.
2. Poor Torch Control
Lack of control can lead to inconsistent welds. Practice maintaining a steady hand and consistent angle to improve your welding technique. A good starting point is to hold the torch at a 15 to 20-degree angle from vertical. This angle allows for better penetration and bead formation.
To enhance your torch control:
- Use a comfortable grip: Ensure your hand is steady and relaxed, as tension can lead to erratic movements.
- Practice on scrap material: Before tackling your main project, practice running beads on scrap pieces to develop your control.
- Watch your travel speed: Moving too fast can lead to weak welds, while moving too slowly can cause excessive heat. Aim for a consistent speed that allows for proper fusion.
3. Not Cleaning the Base Material
Failing to clean the material can lead to contamination and weak welds. Always clean the surfaces thoroughly before starting to weld. Contaminants such as oil, dirt, or rust can compromise the integrity of your weld. Use a stainless steel brush or a chemical cleaner specifically designed for metal surfaces to ensure a clean working area.
Key cleaning steps include:
- Degreasing: Use a solvent or degreaser to remove oils and grease.
- Mechanical cleaning: Use a wire brush or sanding disc to remove rust or scale.
- Final wipe: After cleaning, wipe the surface with a clean cloth to remove any residues from cleaning agents.
Common cleaning mistakes include:
- Skipping the cleaning process: Some welders underestimate the importance of cleaning, leading to poor weld quality.
- Using the wrong cleaning tools: Avoid using tools that can leave residues or contaminants on the metal surface.
Safety Considerations in TIG Welding
1. Personal Protective Equipment (PPE)
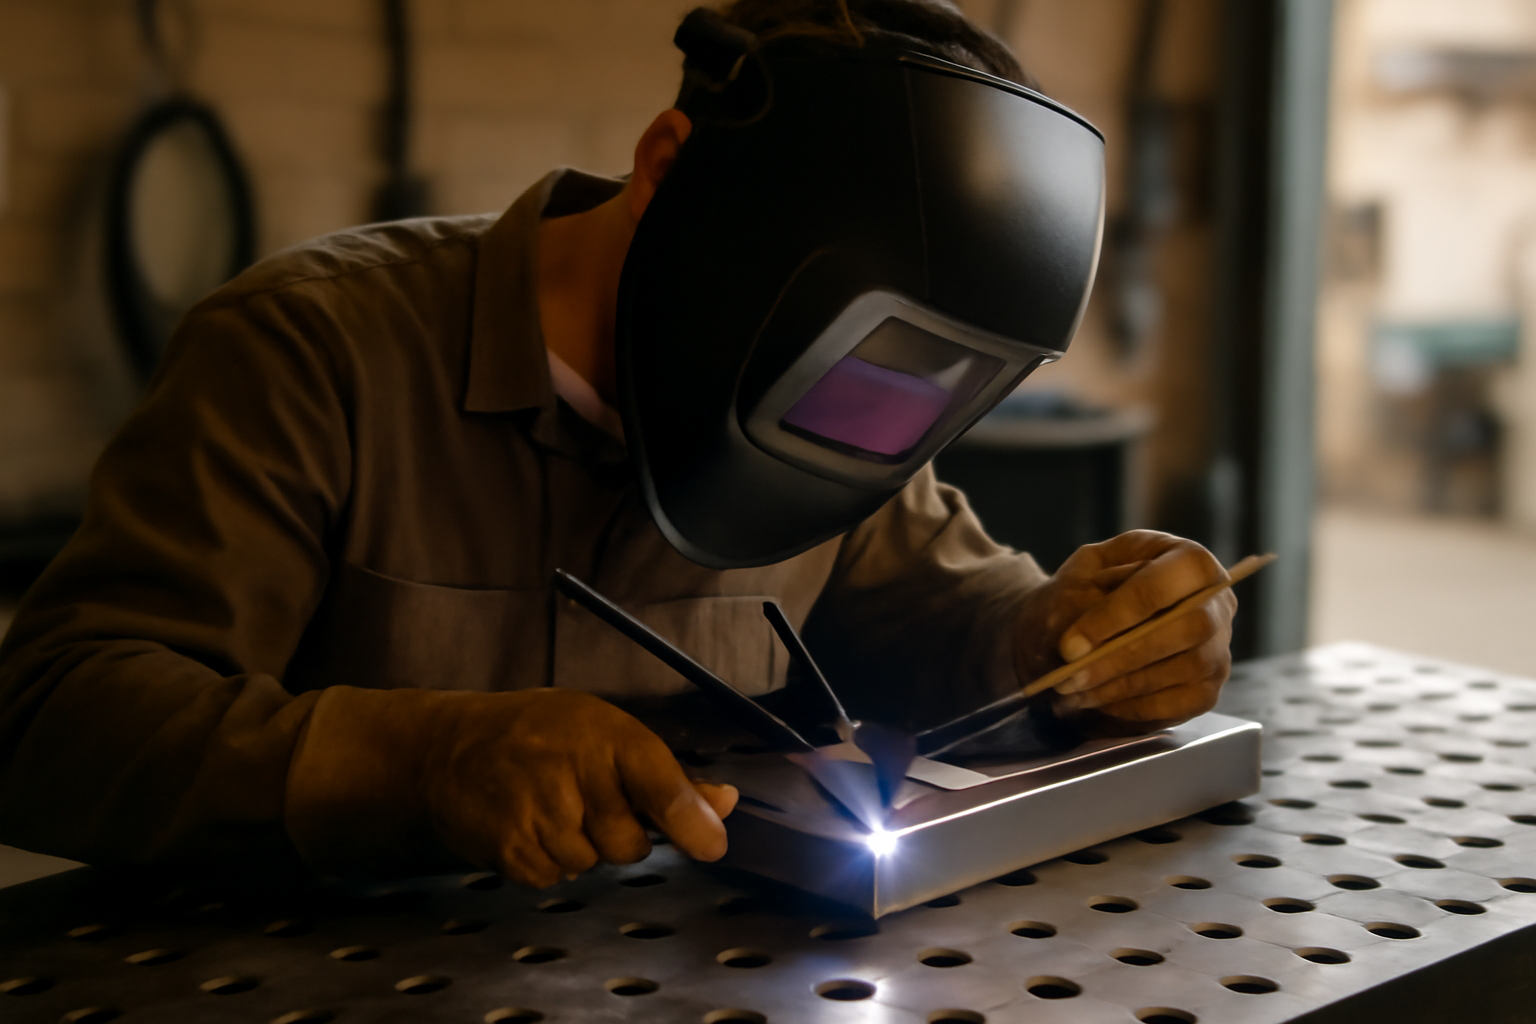
Always wear appropriate PPE, including a welding helmet with proper shade, gloves, and protective clothing. This will help protect you from UV radiation and sparks. Select a welding helmet with a shade rating of at least 10 to 12 for TIG welding, as this will provide adequate protection from the bright arc. Consider using a helmet with an auto-darkening feature for convenience and improved visibility.
When choosing gloves, opt for those made from leather or other durable materials that can withstand heat. They should also provide a good grip to handle the welding torch and filler materials securely. Additionally, wear long-sleeve shirts and pants made of flame-resistant fabric to protect your skin from sparks and heat. Avoid synthetic materials, as they can melt and cause burns.
Check your PPE regularly for any signs of wear or damage, and replace items as necessary to ensure maximum protection. A checklist for PPE might include:
- Welding helmet (with appropriate shade)
- Leather gloves (heat-resistant)
- Flame-resistant clothing
- Steel-toed boots
- Face shield (if needed)
2. Ventilation
Ensure adequate ventilation in your workspace to avoid inhaling harmful fumes. Using a fume extractor can help maintain air quality. Ideally, work in an open area or a well-ventilated workshop. If working indoors, consider using exhaust fans or opening windows to facilitate airflow.
When setting up your workspace, position the fume extractor close to the welding area to effectively capture any harmful gases and particles produced during the welding process. A checklist for ventilation might include:
- Check for open windows or doors to promote airflow
- Ensure that exhaust fans are operational
- Position fume extractor near the welding area
- Use air monitoring devices to check air quality
Be aware of the materials you are welding, as certain metals can produce more toxic fumes than others. For example, stainless steel can emit chromium and nickel fumes, which are hazardous. Always refer to the Material Safety Data Sheet (MSDS) for specific materials to understand potential risks and required precautions.
3. Fire Safety
Keep flammable materials away from your welding area and have a fire extinguisher readily available. Always be aware of your surroundings while welding. Before you begin, conduct a thorough inspection of the workspace for any combustible materials such as paper, wood, or chemicals. Remove or properly store these items to minimize fire hazards.
It's also essential to have a fire extinguisher that is rated for welding fires, typically a Class ABC extinguisher. Familiarize yourself with its location and ensure it is easily accessible in case of an emergency. A checklist for fire safety might include:
- Inspect the workspace for flammable materials
- Have a Class ABC fire extinguisher on hand
- Ensure the extinguisher is fully charged and operational
- Establish a fire watch if working in a confined space
In addition, consider using fire-retardant blankets or curtains to shield nearby surfaces from sparks and heat. Always keep a clear path to exits in case you need to evacuate quickly. Lastly, conduct regular fire drills to ensure everyone in the area knows what to do in the event of a fire.
Choosing the Right TIG Welder for Your Needs
1. Power Requirements
Consider the materials you will be welding and choose a welder that can handle the required amperage. A machine with adjustable settings is beneficial for various tasks. For example, if you plan to weld aluminum, you may need a welder that offers a higher amperage range, typically around 200-250 amps. Conversely, for thinner materials like sheet metal, a welder with a lower amperage range (around 100-150 amps) will suffice. Always check the welder's duty cycle as well; a higher duty cycle allows for longer welding sessions without overheating.
**Checklist for Power Requirements:**
- Identify the materials you will be welding (steel, aluminum, stainless steel, etc.).
- Determine the thickness of the materials.
- Choose a welder with an appropriate amperage range.
- Check the duty cycle for continuous operation needs.
2. Portability
If you plan to weld in different locations, consider a portable TIG welder. Look for lightweight options with durable construction. Many portable models are designed with built-in handles and wheels for easy transport. Additionally, consider the power source; some portable welders operate on standard 120V outlets, while others may require 240V. If you're frequently on the move, a dual-voltage welder can provide flexibility for various job sites.
**Common Mistakes in Portability:**
- Ignoring the weight of the welder when selecting a model.
- Choosing a welder without considering the availability of power sources at different locations.
- Overlooking the importance of a sturdy carrying case or cart.
3. Features to Look For
Advanced features like pulse control, adjustable gas flow, and digital displays can enhance your welding experience. Evaluate what features are essential for your projects. Pulse control, for example, allows for better heat management and can help prevent warping in thinner materials. Adjustable gas flow is crucial for achieving clean welds, especially when working with various materials. A digital display can make it easier to monitor settings and adjustments during the welding process.
Essential Features Breakdown:
- Pulse Control: Ideal for thin materials and precise welding.
- Gas Flow Adjustment: Necessary for different material types and thicknesses.
- Digital Display: Provides accurate readings and easier adjustments.
- Foot Pedal Control: Allows for better control over the welding process, especially for intricate tasks.
- AC/DC Capability: Enables welding of both aluminum (AC) and steel (DC).
**Tips for Evaluating Features:**
- Consider your skill level; beginners may not need all advanced features initially.
- Read reviews and seek recommendations from experienced welders.
- Test the welder in-store if possible to get a feel for its operation and features.
Conclusion
Mastering TIG welding techniques requires practice and an understanding of the fundamentals. By focusing on your workspace setup, equipment configuration, and advanced techniques, you can significantly improve your welding skills. Avoid common mistakes, prioritize safety, and choose the right equipment to enhance your welding experience. With dedication and practice, you will become proficient in TIG welding, opening up new opportunities for creativity and craftsmanship in metalworking.
Key Takeaways
- Establish a clean and organized workspace to minimize distractions and maximize efficiency.
- Invest in quality TIG welding equipment that suits your specific needs and projects.
- Practice essential techniques such as proper torch angle, travel speed, and filler rod manipulation.
- Stay updated on safety protocols to ensure a safe working environment.
Practical Steps for Improvement
- Set Up Your Workspace: Ensure good ventilation, adequate lighting, and easy access to tools. Keep your welding area free from clutter.
- Familiarize Yourself with Your Equipment: Read the manuals for your TIG welder and accessories to understand their functions and settings.
- Practice Regularly: Dedicate time each week to practice different techniques, such as bead placement and joint configurations.
- Seek Feedback: Join welding forums or local welding groups to share your work and receive constructive criticism.
Common Mistakes to Avoid
- Poor Torch Angle: Holding the torch at the wrong angle can lead to inconsistent welds. Aim for a 15-degree angle from vertical for better control.
- Inconsistent Travel Speed: Moving too fast or too slow can affect the weld quality. Practice maintaining a steady speed that matches the material thickness.
- Neglecting Filler Rod Technique: Improper filler rod feeding can create weak welds. Practice feeding the rod smoothly into the weld pool.
- Ignoring Safety Gear: Always wear appropriate safety gear, including a welding helmet, gloves, and protective clothing to prevent injuries.
Next Steps in Your Welding Journey
As you continue to refine your TIG welding skills, consider exploring advanced techniques such as:
- Welding Aluminum: Learn about the specific settings and techniques required for aluminum, which has different properties compared to steel.
- Multi-Pass Welding: Practice techniques for creating strong welds on thicker materials by layering multiple passes.
- Welding Different Joint Types: Experiment with various joint configurations, such as butt joints, lap joints, and T-joints, to broaden your skill set.
With dedication and practice, you will become proficient in TIG welding, opening up new opportunities for creativity and craftsmanship in metalworking. Remember, the journey to mastering TIG welding is ongoing, and continuous learning will keep your skills sharp and your projects exciting.
In short
This guide breaks down TIG Welder techniques into the core parts, best practices, and a practical framework you can follow. Built for Enthusiasts / learners / participants (not sellers). You?ll see practical tips, examples, and next steps.
Topic map
This pillar covers the full topic through the following subtopics.
- How-to: how to master TIG Welder techniques
- How-to: how to practice TIG welding effectively
- How-to: how to improve your TIG welding skills (coming soon)
- How-to: how to start with TIG welding basics (coming soon)
- Problem / Fix: common mistakes in TIG welding techniques (coming soon)
- Problem / Fix: frustrations with TIG welding for beginners (coming soon)
- Problem / Fix: why TIG welding can be challenging (coming soon)
- Comparison: TIG welding techniques vs MIG welding (coming soon)
- Comparison: beginner vs expert TIG welding methods (coming soon)
- Scenario: TIG welding techniques for beginners (coming soon)
- Scenario: TIG welding techniques when you're short on time (coming soon)
- Buyer decision: choosing the best TIG welding technique for you (coming soon)
- Buyer decision: what to consider for TIG welding techniques (coming soon)
- FAQ: is TIG welding worth the investment? (coming soon)
- FAQ: what are the key terms in TIG welding? (coming soon)
Context and related concepts
Fundamentals ? Beginner basics ? Terminology ? Glossary ? Skills ? Techniques ? Best practices ? Common mistakes ? Gear / tools / materials ? Options ? Use-cases ? Tradeoffs ? Culture ? Lifestyle ? Community norms ? History ? People / creators / athletes ? Events ? Trends ? Care / maintenance ? Safety ? Sizing / fit (if relevant)
About this site: We are an online distributor for Industrial Equipment, metal working equipment, Arbor Presses, Bandsaw, Belt Grinder, Brake, Cold Saw, Die Set, Drill Press, Dust Collector, Grinder, Ironworker, Laser Engraver, Lathe,
Metal Sander, MIG Welder, Notcher, PAPR System, Parts, Plasma Cutter, Press, Rod Oven, Shear, Shop Press
Spool Feeder, TIG MIG Welder, TIG Welder, Track Torch, Tube Bender, Welding Cart, Welding Helmet, Welding Table
We are an authorized retailer for Arc Star, Blue Demon, Blue Star, HTP America, Laguna Tools, Metal Man, Metalpro, Optrel, Sumner, TIG Star, WeldPro