
TIG Welding Techniques for Beginners Who Want to Improve Their Skills
Learning TIG welding can be a rewarding venture for beginners, whether you're a metalworking hobbyist or an aspiring professional. Mastering the fundamental techniques is crucial for achieving high-quality welds and gaining confidence in your abilities. This guide will focus on practical TIG welding techniques tailored specifically for beginners looking to enhance their skills.
If you're just starting with TIG welding, understanding the essential techniques can seem overwhelming. However, by focusing on a few key methods and practicing them consistently, you can significantly improve your welding proficiency. This post will provide you with practical guidance to apply as you work on your TIG welding projects.
Table of Contents
If This Is You...
You might find yourself in a situation where you've recently acquired a TIG welder and are eager to start welding but feel uncertain about where to begin. Perhaps you've watched tutorials, read about the process, but still need clarity on the techniques that will help you create clean and strong welds. This guide is for you if you want to build a solid foundation in TIG welding. Mastering TIG Welder Techniques: Your Comprehensive Guide.
Understanding the Basics
Before diving into welding, it's crucial to familiarize yourself with the fundamental components and settings of your TIG welder. Here's a checklist to get you started: FabCore X Supply resources.
- Power Supply: Ensure your welder is set to the correct voltage and amperage for the material you're working with. Consult your welder's manual for specific settings based on material thickness.
- Tungsten Electrode: Choose the right type and diameter of tungsten for your project. For beginners, a 2% thoriated tungsten is commonly recommended. Ensure the tungsten is sharpened to a point for optimal arc stability.
- Filler Rod: Select an appropriate filler rod that matches the base metal. For aluminum, use 4047 or 5356 rods; for stainless steel, consider ER308L. Always check the compatibility of filler rods with your specific base metals.
- Shielding Gas: Argon is the most commonly used shielding gas for TIG welding. Ensure your gas flow rate is set correctly (typically 15-20 cubic feet per hour). Use a flow meter to accurately gauge the flow rate.
Setting Up Your Workspace
A well-organized workspace can significantly impact your welding experience. Here are some tips for setting up:
- Ventilation: Ensure your workspace is well-ventilated to avoid harmful fumes. Use exhaust fans or weld in an open area to facilitate airflow.
- Lighting: Use bright, focused lighting to see your work clearly. Consider using task lighting that can be positioned to illuminate the weld area directly.
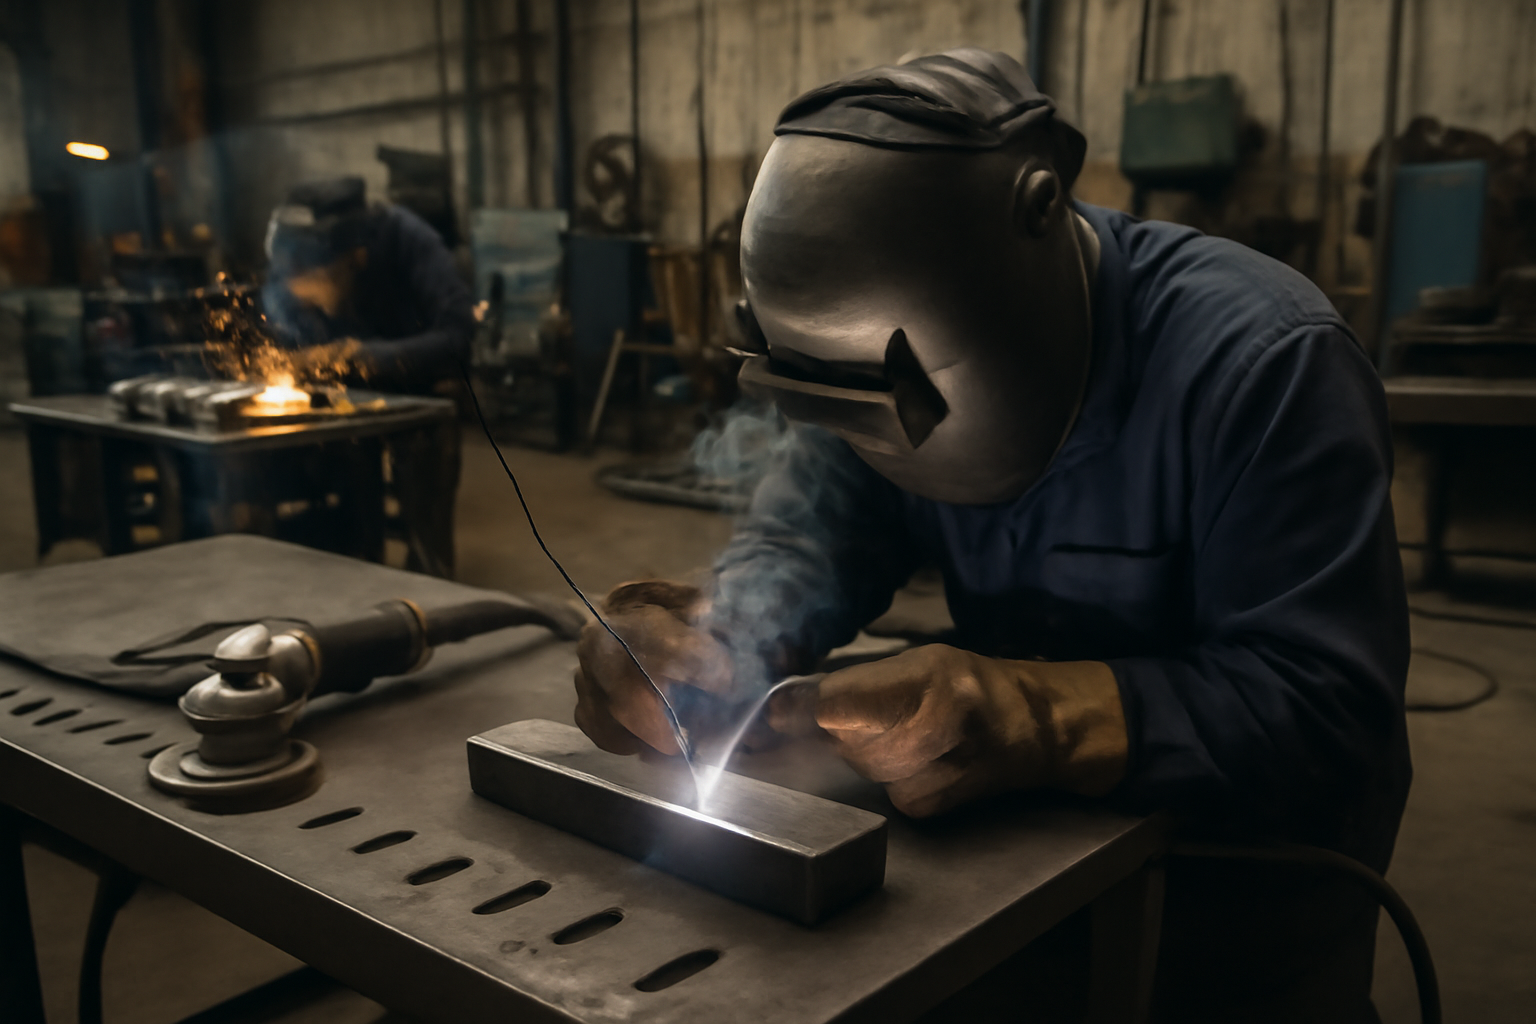
- Safety Gear: Always wear appropriate safety gear, including a welding helmet, gloves, and protective clothing. Ensure your helmet has the correct shade for TIG welding, typically between shade 10 and 14.
Basic TIG Welding Techniques
Once you have your equipment ready and workspace set up, it's time to practice some basic techniques. Here are key techniques you should master:
1. The Arc Start
Starting the arc is crucial for a successful weld. Here's how to do it:
- Position the tungsten electrode about 1/8 inch away from the workpiece.
- Use the high-frequency start function (if available) to initiate the arc without touching the metal. If your welder lacks this feature, a scratch start can be used, but be cautious to avoid contaminating the tungsten.
- Once the arc is established, slowly move the electrode closer to the workpiece, keeping a steady hand to maintain arc stability.
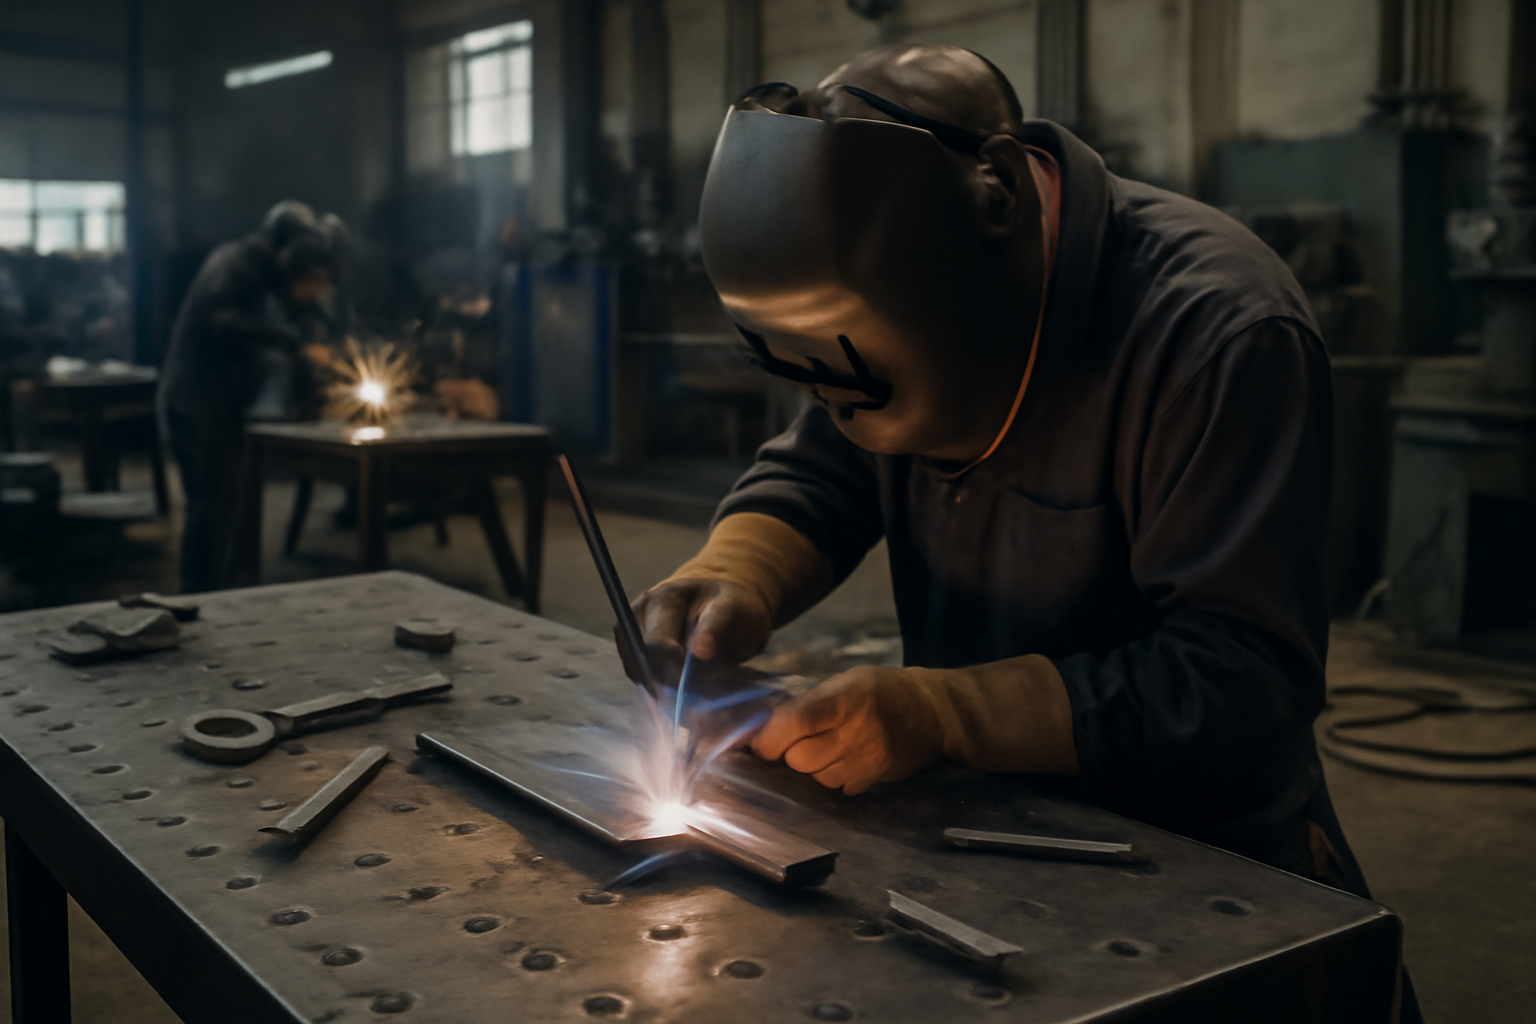
2. Maintaining the Arc
Consistent arc length is vital for a stable weld. Aim for a distance of about 1/8 inch between the electrode and the workpiece. Here are some tips:
- Practice keeping the arc steady while moving the torch along the joint. Use your wrist for fine adjustments rather than your whole arm.
- Adjust your travel speed to ensure the weld pool remains molten but doesn't overheat the material. A good rule of thumb is to move at a speed that allows the weld pool to maintain a consistent shape without sagging or burning through.
3. Adding Filler Metal
Incorporating filler metal into your weld requires practice. Follow these steps:
- When the weld pool is visible and molten, dip the filler rod into the leading edge of the pool. Aim for a 45-degree angle to facilitate melting.
- Use a steady hand to maintain a consistent feed rate, ensuring the filler rod melts evenly. Avoid dipping too deeply into the pool, as this can cause contamination.
- Withdraw the filler rod as needed to control the amount of metal added to the weld pool. Practice will help you find the right balance for different materials and thicknesses.
Common Mistakes to Avoid
As a beginner, you may encounter several common pitfalls. Here's a list to help you steer clear of them:
- Inconsistent Arc Length: This can lead to weak welds. Practice maintaining a steady distance between the tungsten and the workpiece. Use a visual reference, such as a piece of tape, to help maintain consistent distance during practice.
- Improper Gas Flow: Too low or too high gas flow can cause contamination or porosity in the weld. Adjust your settings based on the material and thickness. A flow rate that is too high can cause turbulence, while too low can lead to oxidation.
- Incorrect Filler Rod Use: Always match the filler material to the base metal. Using the wrong filler can weaken your weld. Make a habit of checking compatibility charts before starting a project.
Practice Makes Perfect
Finally, remember that practice is essential in mastering TIG welding. Set aside time to work on scrap metal pieces to refine your technique. Here are some practice ideas:
- Weld straight beads on flat plates. Focus on maintaining a consistent speed and arc length.
- Practice making T-joints and lap joints. These joints are common in fabrication and will help you understand how to manipulate the torch and filler rod simultaneously.
- Experiment with different materials to understand how each behaves under the arc. Try welding mild steel, stainless steel, and aluminum to gain versatility.
- Record your practice sessions. Watching your technique can help identify areas of improvement.
By following these guidelines and continually practicing, you will build confidence and skill in TIG welding. As you progress, consider exploring more advanced techniques and projects to further enhance your capabilities. Set specific goals for each practice session, such as improving your arc stability or mastering a particular joint type, to track your progress effectively.
Step-by-Step Guide to Improving Your TIG Welding Techniques
1. Understanding Your Equipment
Before diving into techniques, familiarize yourself with your TIG welder and its components. A dual voltage TIG welder can offer versatile usage in different environments. Make sure to check the welding machine specifications to ensure compatibility with the materials you plan to work with. Understand the settings you can adjust, such as amperage, gas flow, and pulse settings.
Take the time to read through the user manual that comes with your welder. It often contains valuable information about optimal settings for various materials and thicknesses. Additionally, practice adjusting settings on scrap materials to see how changes affect your welds. This hands-on experience will build your confidence and understanding of the machine.
2. Preparing Your Workspace
Your workspace plays a crucial role in the quality of your welds. Ensure you have a clean, well-lit area to work in. Gather your welding equipment collection, including your welding machine, tungsten electrodes, filler rods, and appropriate personal protective equipment (PPE). A clutter-free space reduces distractions and helps you focus on the task at hand.
Consider using a welding table that is at a comfortable height for you, reducing strain during long welding sessions. Ensure that your workspace is well-ventilated to avoid inhaling harmful fumes. Organize your tools and materials within arm's reach to minimize movement and maintain focus on your welding task.
3. Selecting the Right Tungsten Electrode
Selecting the correct tungsten electrode is vital for successful TIG welding. For beginners, a 2% thoriated tungsten or a ceriated tungsten is recommended for its ease of use. The diameter of the electrode should match the thickness of the material you are welding. Practice grinding your tungsten to a pointed tip to ensure a stable arc.
When grinding your tungsten, aim for a taper of about 2-3 times the diameter of the electrode. This will help produce a more concentrated arc, which is essential for precise welding. Additionally, keep a dedicated grinder for tungsten electrodes to prevent contamination from other materials. Regularly inspect your electrodes for wear and replace them as necessary to maintain optimal performance.
4. Mastering the Arc Start
Starting the arc is one of the most critical aspects of TIG welding. Use the high-frequency start feature on your welder to initiate the arc without touching the workpiece. This technique minimizes contamination and ensures a clean start. Practice starting the arc at different distances from the workpiece to get comfortable with your machine's response.
In addition to using the high-frequency start, be mindful of your torch angle when initiating the arc. A slight tilt can help direct the arc more effectively and reduce the risk of contamination. Experiment with different starting positions to find what feels most natural and produces the best results for you.
5. Controlling the Heat and Travel Speed
Effective control over heat and travel speed is essential for creating a strong weld. Maintain a steady hand and practice moving the torch at a consistent pace. Too fast will result in weak, undercut welds, while too slow can cause burn-through. Adjust your amperage based on the thickness of the materials to avoid overheating.
One effective way to practice controlling heat and speed is to use a stopwatch or timer. Set a consistent travel speed and time yourself while welding on scrap material. This exercise will help you develop muscle memory for maintaining the right pace. Additionally, observe the color and appearance of the weld pool; a bright, shiny pool indicates proper heat, while a dull or dark pool suggests overheating.
6. Using Filler Rods Effectively
When adding filler material, ensure you maintain a proper distance between the filler rod and the arc. The key is to introduce the filler rod into the molten pool without disrupting it. Practice the technique of dipping the rod into the weld pool while maintaining a consistent heat source from the arc.
It can be helpful to practice on scrap pieces to find the right angle and distance for adding filler. A common mistake is to dip the rod too deep into the molten pool, which can cause contamination. Aim to keep the tip of the filler rod just above the surface of the weld pool to maintain a clean addition of material. Additionally, remember to keep your filler rod clean and free from oils or contaminants before use.
7. Post-Welding Cleanup
Once you've completed your weld, allow it to cool naturally. Avoid quenching it in water as this can cause cracking. Clean the weld area using a wire brush or grinder to remove any slag or oxidation, ensuring a neat finish. Properly maintaining your welding torch accessories will help prolong their lifespan and ensure consistent performance.
After cleaning, inspect your welds for defects or inconsistencies. Look for issues such as porosity, undercutting, or incomplete fusion. Keeping a log of your welding sessions can help track your progress and identify areas for improvement. Additionally, consider using a protective coating on your welds to prevent oxidation and corrosion, especially in outdoor or harsh environments.
Conclusion: Your Next Steps
To truly improve your TIG welding skills, commit to practicing these techniques regularly. Set aside time each week to work on specific aspects of welding, whether it's practicing arc starts, controlling heat, or using filler rods. As you gain experience, consider exploring more advanced techniques and checking out FabCore X Supply resources for additional tips and tools that can aid your journey in mastering the art of TIG welding.
Establish a Practice Routine
Creating a structured practice routine is essential for developing your TIG welding skills. Here's a suggested weekly practice plan to help you stay focused:
- Day 1: Arc Starts - Spend at least 30 minutes practicing how to initiate the arc smoothly. Focus on maintaining a steady hand and the right distance from the workpiece. Use scrap metal to practice different distances and observe how it affects the arc stability. Record your findings to identify the optimal distance for various materials.
- Day 2: Heat Control - Work on controlling the heat input by adjusting your amperage settings. Practice welding on different materials to understand how heat affects each one. For example, try aluminum versus stainless steel and note the differences in how they react to heat. Create a heat input chart that includes material types, thicknesses, and corresponding amperage settings for quick reference.
- Day 3: Filler Rod Techniques - Dedicate time to learning how to properly add filler rod to your welds. Experiment with different rod types and sizes to see how they influence the weld quality. Keep a log of which rods work best for specific materials and thicknesses. Try welding with both ER70S-6 and ER4047 rods on aluminum and document the differences in flow and finish.
- Day 4: Joint Preparation - Practice preparing different types of joints (butt, lap, corner) and understand the importance of fit-up and cleanliness. Make sure to use proper tools for cleaning and fitting to ensure the best weld quality. Develop a checklist that includes steps for cleaning, measuring, and aligning joints to ensure consistency in your practice.
- Day 5: Welding Positions - Try welding in various positions (flat, horizontal, vertical, overhead) to develop versatility and comfort in different scenarios. Consider setting up a mock project that requires you to switch positions frequently. Document your comfort level and any challenges faced in each position to track your progress.
- Day 6: Review and Reflect - Spend this day reviewing your past week's work. Take notes on what went well and what needs improvement. Consider recording videos of your practice sessions for later review to catch mistakes you might not notice in real-time. Create a feedback loop by discussing your practice with a mentor or peer to gain additional insights.
- Day 7: Advanced Techniques - Once you feel confident with the basics, explore more advanced techniques like pulse welding or using different shielding gases. Research the benefits of each technique and practice them on scrap pieces to gauge their effectiveness. Keep a journal of your experiments with advanced techniques, noting the settings used and the results achieved.
Common Mistakes to Avoid
As you practice, be aware of some common pitfalls that can hinder your progress:
- Inconsistent Arc Length: Maintaining a consistent arc length is crucial for good welds. Too long can cause a weak weld, while too short can lead to contamination. Use a visual guide or a reference point to help maintain the correct distance. Consider marking your torch with a tape line to serve as a guide for optimal distance.
- Improper Heat Settings: Using incorrect amperage can cause burn-through or insufficient penetration. Always adjust your settings based on material thickness and type. Keep a chart of recommended settings for different materials as a quick reference. Regularly verify your settings with a multimeter to ensure accuracy.
- Neglecting Cleanliness: Contaminants on the base metal or filler rod can lead to defects. Always clean your materials thoroughly before starting. Use a wire brush or grinder to remove rust, paint, or oil from the surfaces. Develop a cleaning protocol that includes the use of solvents for stubborn contaminants.
- Overworking the Weld: Trying to manipulate the puddle too much can lead to a poor finish. Practice finding the right balance between control and allowing the weld to flow. Set a timer for yourself to help resist the urge to overwork your welds. Aim for a specific time frame per weld to encourage decisiveness in your technique.
- Ignoring Safety Gear: Always wear appropriate safety gear, including a welding helmet, gloves, and protective clothing. Safety should never be compromised. Make it a habit to check your gear before starting any welding session. Create a checklist of safety equipment to ensure you never skip essential items.
Utilizing Resources
Take advantage of various resources available to enhance your learning experience:
- Online Tutorials: Look for video tutorials that demonstrate techniques and provide visual guidance. Follow channels that focus specifically on TIG welding for the best insights. Bookmark your favorite channels and create a playlist of essential videos for easy access.
- Books and Manuals: Consider investing in books that cover TIG welding theory and practical applications. Look for titles that include illustrations and step-by-step guides to reinforce your learning. Join a local library or online forum to exchange resources with fellow welders.
- Workshops and Classes: If possible, attend local workshops or classes to receive hands-on instruction and feedback from experienced welders. Engaging with instructors can provide personalized tips that online resources may not offer. Network with instructors to gain insights into upcoming events or advanced workshops.
- Networking: Join welding forums or local welding clubs to connect with other welders. Sharing experiences and tips can greatly enhance your learning. Participate in discussions and ask for critiques on your work to gain different perspectives. Consider setting up a regular meet-up for local welders to collaborate and share knowledge.
As you gain experience, consider exploring more advanced techniques and continuously seek out resources that can aid your journey in mastering the art of TIG welding. Remember, consistent practice and a willingness to learn from mistakes will lead to significant improvements over time. Keep pushing your limits, and don't hesitate to revisit the fundamentals as needed to solidify your skills.
In short
This post focuses on TIG welding techniques for beginners with a practical approach you can apply right away. Built for Enthusiasts / learners / participants (not sellers). You?ll see a plan for this exact situation and what to do next.
Quick answer
In this situation, TIG welding techniques for beginners works best when you stabilize the basics, pick one clear path forward, and remove the biggest bottleneck first. Once that's solved, progress accelerates. Audience-first only. Write like a trusted niche blog: helpful, clear, structured, and genuinely informative. Focus on fundamentals, improvement, terminology, culture, people, gear, and common scenarios in the niche. Do NOT write seller/operator content (no "Shopify apps", no "optimize your store", no "collections setup", no "increase conversion rate", no SEO/ads talk). Avoid aggressive CTAs and "buy now" language. If products are mentioned, keep it subtle and contextual (examples, use-cases, what to look for), never pushy.
Context and related concepts
Fundamentals ? Beginner basics ? Terminology ? Glossary ? Skills ? Techniques ? Best practices ? Common mistakes ? Gear / tools / materials ? Options ? Use-cases ? Tradeoffs ? Culture ? Lifestyle ? Community norms ? History ? People / creators / athletes ? Events ? Trends ? Care / maintenance ? Safety ? Sizing / fit (if relevant)
FabCore X Supply: FabCore X Supply is an online distributor of industrial metalworking and fabrication equipment. We sell equipment used in welding, cutting, forming, and machining including TIG welders, MIG welders, plasma cutters, bandsaws, cold saws, drill presses, lathes, belt grinders, ironworkers, tube benders, metal shears, press brakes, shop presses, arbor presses, notchers, track torches, welding tables, welding carts, welding helmets, PAPR welding respirators, rod ovens, and metal fabrication accessories. We are an authorized retailer for manufacturers including Arc Star, Blue Demon, Blue Star, HTP America, Laguna Tools, Metal Man, Metalpro, Optrel, Sumner, TIG Star, and WeldPro.